
Azure SQL DB is a PaaS offering from Microsoft on Azure for hosting a SQL database. This may not be ideal for all environments. But if you have a database which can work in isolation handling requests from one or more applications, Azure SQL DB may be a right fit for you. One common use-case is for ISVs who host multiple tenant databases.
One of the challenges faced is how to migrate to Azure with minimal downtime, especially when your database is already in production use. There are a couple of methods to migrate the database from your production environment to Azure SQL DB.
One method is by exporting your database as a BACPAC file and importing it into Azure SQL DB. There are few points to note when using this method.
- The production database should not change from the point you start the export till the database is imported into Azure SQL DB. This increases the production downtime.
- The process involves exporting a BACPAC file, using tools like SqlPackage.exe to import the database into Azure SQL DB.
- The rollback process is simple, allowing you to revert back to existing database (if your business can afford to lose any changes done on Azure SQL DB). The amount of data loss depends on at what stage you decided to rollback.
To achieve minimal downtime, I will detail a second method of migration: using Transactional Replication.
Transactional replication to Azure SQL DB was announced in 2015 as being in Public Preview. On 23 October 2017 this feature was announced as generally available. To setup transactional replication from on-prem SQL Server to Azure SQL DB, you will need to install the latest version of SSMS (v17.3). The process of migration involves the following steps.
Testing/POC
- Run the Microsoft Data Migration Assistant (DMA) to check if your database is ready to migrate to Azure. This tool will help you assess if your database has any compatibility issues to migrate to Azure SQL DB. More information about DMA is available here.
- Fix any issues identified in step 1 to prepare your database for migration and repeat.
- Create an Azure SQL DB shell (empty database) using the Azure portal. You can follow the step by step guidelines as described here.
- Setup transactional replication with the following configuration:
- Configure an on-prem SQL Server as the distributor. You can choose the SQL Server hosting the production database to be the distributor, or any other SQL Server.
- Configure a new publication for the production database you wish to migrate to Azure SQL DB. Choose all the objects you want to migrate. In general, choose all databases unless you wish not to migrate specific unwanted tables, e.g., archive history tables.
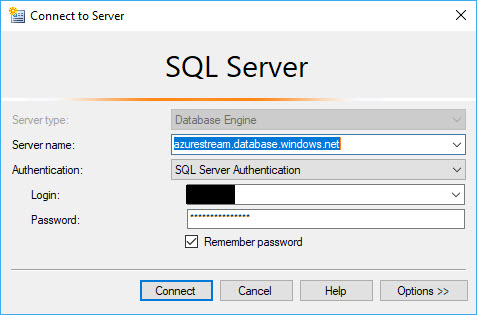
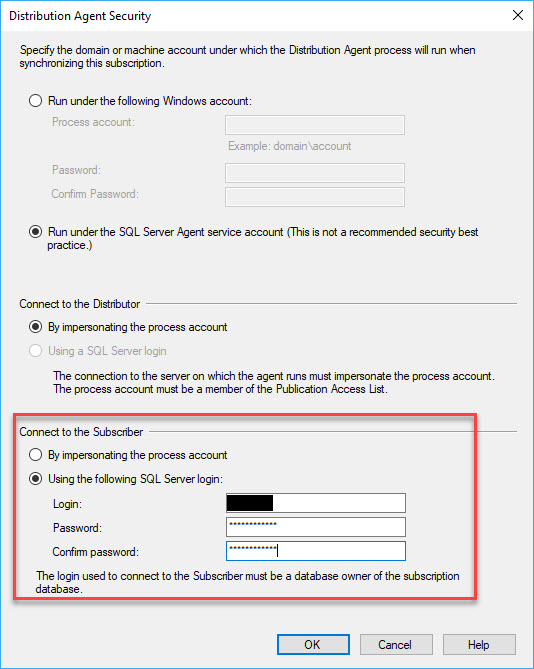
- Add a push subscriber by connecting to the Azure SQL DB you created in step 3. When connecting to the subscriber, connect using the details provided when creating the database in Azure.
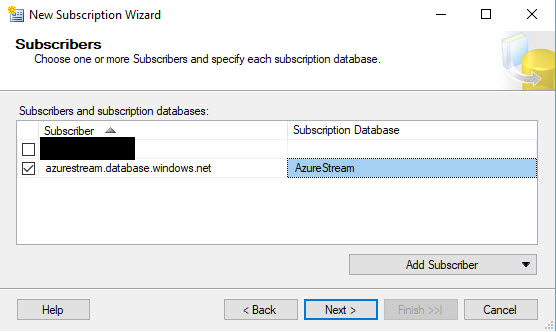
- After successfully adding the subscriber, run the snapshot agent and complete the initialization.
- Once the database is in sync (and being kept in sync), choose a time when you want to test your application connectivity to Azure SQL DB.
- Remove replication.
- Make changes in test application configuration to connect to Azure SQL DB.
- Complete end-to-end testing of the application. This should be exhaustive and detailed to ensure business continuity.
Production Migration
- Complete steps 1 to 4 as performed for testing.
- Once the Azure SQL DB is in sync, choose a time to cutover the production database to Azure SQL DB.
- Shutdown the applications and make sure the replication is in sync.
- Remove replication and shutdown the on-prem production instance.
- Make changes in the application configurations so that they will connect to Azure SQL DB.
- Start the applications and complete functional testing.
Rollback Plan
There are two cases to consider rollback.
The first case, when the functional testing fails and the Azure SQL DB is still not updated with any valid production data.
- In this case, the rollback is simple. Reconfigure the applications to point to the on-prem database.
- Start the on-prem SQL Server and start the applications.
- Complete functional testing to ensure applications are behaving as expected using on-prem database.
The second case, when the functional testing passes. and the application runs using Azure SQL DB for few hours or days and then you realise that there are functional issues. Hopefully this is a rare scenario and mostly arises due to poor testing.
- In this case, it becomes critical to get back the production data inserted into Azure SQL DB.
- The method to sync data back from Azure SQL DB to the on-prem SQL Server database is provided by Azure Data Sync. This will be covered in detail in a future article.
Downtime
The only downtime needed for migration using transactional replication to Azure SQL DB is during the cutover. This depends on how quickly you can stop your applications, shutdown the on-prem SQL Server and make the configuration changes in applications to point to migrated Azure SQL DB. All these tasks can be automated with PowerShell or other tools, so that the downtime can be minimal.
Conclusion
Azure SQL DB is a tailored service that will suit most applications that connect to a single database. With transactional replication now GA, and the tools available in the latest SSMS, the door has been opened to more users for easier migrations. Transactional Replication is the easiest and most flexible method to migrate to Azure SQL DB with minimal downtime and lowest impact on business continuity.
Happy Learning,
Manu